Cauldron of Carnage Unleashed: Your Essential Strategy Guide for the Flarendo and Torq Encounter in Liberation of Undermine (Normal & Heroic)
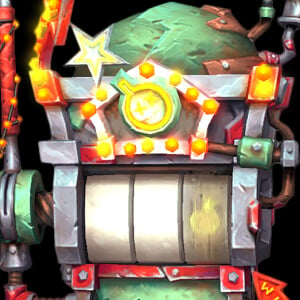
A colorful, mechanized contraption features various gears and lights, possibly serving as a component within the "Cauldron of Carnage" in the "Liberation of Undermine" raid for World of Warcraft.
Cauldron of Carnage Unleashed: Your Essential Strategy Guide for the Flarendo and Torq Encounter in Liberation of Undermine (Normal & Heroic)
Dual-boss encounters have long tested the mettle of raid teams in World of Warcraft, but few are as layered—or as punishing for even minor mistakes—as the Cauldron of Carnage within the Liberation of Undermine raid.
Featuring the titanic dinosaur, Flarendo, and the electrifying gorilla, Torq, this fight intertwines personal responsibility, coordinated movement, and razor-sharp group communication.
Whether you’re pushing early progression on Normal or braving the added chaos of Heroic, mastering this encounter is vital for any raid hoping to conquer Undermine and claim its richest spoils.
This comprehensive strategy guide breaks down the fight’s unique phases, essential mechanics, optimal tactics for both Normal and Heroic difficulties, and the bounty of rewards that await in the cauldron’s heart.
1.
E
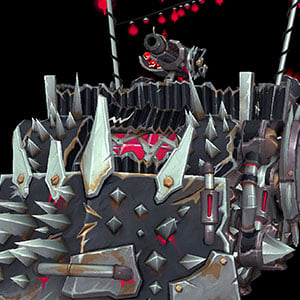
A heavily armored and spiked vehicle designed for combat, featuring mounted weaponry and a fierce aesthetic, likely associated with the "Geargrinders" faction in the "Liberation of Undermine" raid from World of Warcraft.
ncounter Overview: Flarendo & Torq in the Cauldron of Carnage
The Cauldron of Carnage is defined by its dual-boss format.
Raid teams face Flarendo, a fire-spewing dinosaur, and Torq, a thunderous gorilla, simultaneously.
The key to victory is tight separation and excellent communication, as these two can easily wipe uncoordinated groups:
- Boss Separation & Enrage: The two bosses must remain at least 40 yards apart at all times to avoid activating the Raised Guard shield—a 99% damage reduction effect that renders them all but invincible when close together.
- Simultaneous Kills Required: If one boss dies before the other, the survivor gains a stacking 10% damage buff every five seconds and increased range (King of Carnage), quickly ramping into an unavoidable wipe scenario.
- Raid Split & Assignment: The arena’s layout and the strict 40-yard separation force the raid to divide into two balanced teams, each with its own tank, healers, and a tailored DPS distribution to match the unique mechanics posed by Flarendo and Torq.
- Stacking DoT Swap Mechanics: Both bosses inflict stacking damage-over-time debuffs on players near them, which can only be safely reset by swapping sides after each intermission phase (Colossal Clash).
- Environmental & Movement Hazards: From persistent molten pools to lightning fields and movement-restricting mechanics, players must be diligent in spatial awareness.
This encounter is a crucible for raid fundamentals, making discipline in movement, positioning, and group coordination absolutely critical.
2.
Breaki
ng Down Boss Abilities: Phases & Mechanics
The fight is a continuous, single-phase struggle, punctuated by high-stress intermissions.
Here’s how each boss tests your raid:
**Flare

The text features a character from World of Warcraft alongside the title "Cauldron of Carnage Boss Strategy Guide" and the branding "MYTHIC TRAP."
ndo's Mechanics (Fire Side)**
- Blistering Spite: Applies a stacking Fire DoT to players within 60 yards.
Stack count resets only after intermission swaps.
- Scrapbomb: Randomly marks a player, requiring at least 4 players to soak.
On Heroic, leaves a permanent burning Molten Pool and triggers dodgeable Fiery Waves.
Placement near the arena’s edge is crucial.
- Blastburn Roarcannon: Fixates a player and fires a deadly laser.
Designated players must aim the beam at a wall, away from the raid and the other boss’s group.
- Eruption Stomp (Tankbuster): Heavy magic damage, knock-up effect, spawns fire waves—demanding robust magic mitigation from tanks.
- Molten Phlegm (Heroic only): All players on Flarendo’s side gain an AoE circle after Scrapbomb; immediate spreading is mandatory.
**Torq's Mecha
nics (Lightning Side)**
- Galvanized Spite: Applies a stacking Nature DoT to players within 60 yards—again, requiring periodic swaps to clear stacks.
- Static Charge: Players on this side gain an energy bar that fills when moving; reaching full results in a 6-second stun (affects nearby allies on Heroic).
Movement discipline is paramount.
- Thunderdrum Salvo: Fires targeted missiles, forcing players to move—but too much movement risks filling the Static Charge bar.
- Lightning Bash (Tankbuster): Heavy physical damage plus a nature hit based on how much damage was unmitigated.
Strong physical defensives are required.
- Voltaic Image (Heroic only): Spawns adds that fixate players, exploding on contact and leaving silencing electric pools; must be CC’d or kited until they despawn.
**Ge

A large mechanical character named Gromm is prominently featured, surrounded by a colorful and chaotic environment with palm trees, indicative of a dynamic battle setting in the Cauldron of Carnage raid from World of Warcraft.
neral Mechanics and Intermissions**
- Raised Guard: If the bosses move too close together, they take only 1% of incoming damage.
Positioning is non-negotiable.
- Colossal Clash (Intermission at 100 Energy): Both bosses leap to center stage for 20 seconds.
Raid-wide DoT pulses every second, while both fire and lightning AoEs saturate the arena.
Each new intermission increases this damage by 30%, introducing a soft enrage.
- Group Swaps: After each intermission, Flarendo and Torq groups MUST swap sides to reset their stacking debuffs; failure here leads to raid-wide collapse.
3.
Wi
nning Tactics for Normal & Heroic Difficulty
Conquering Flarendo and Torq is all about proactive raid splits, error-free group swaps, and granular movement control—especially on Heroic.
**Raid Setup a

A fierce, muscular character with red and grey armor stands beside a large, mechanical dinosaur head, accompanied by bold text labeling it as a "Cauldron of Carnage Boss Guide."
nd Role Assignments**
- Ideal Composition: 2 tanks, 4 healers, 14 DPS (for 20-player Heroic).
- Flarendo Group: Lean on ranged DPS and players with soak or movement utility.
- Torq Group: Prefer melee and mobile ranged; movement management is critical.
**Raid Split & Assig
nments**
- Assemble two balanced groups with 1 tank, 2 healers, and appropriate DPS to each boss.
- After every intermission, groups cross to the opposite boss.
Immediately reset stacking DoTs by doing so.
**Priority Mecha

A colorful, mechanized contraption features various gears and lights, possibly serving as a component within the "Cauldron of Carnage" in the "Liberation of Undermine" raid for World of Warcraft.
nics**
Flarendo (Fire):
- Scrapbomb: Assign at least 4 soakers per bomb.
On Heroic, plan bomb placements to avoid blocking safe paths or overlaps.
- Blastburn Roarcannon: Assign a designated player to handle beams, and rotate as needed.
Beam must NEVER face the raid or Torq’s side.
- Molten Phlegm (Heroic): All marked spread quickly; pre-assign safe zones.
Torq (Lightning):
- Static Charge: Educate players on UI bar.
Move only when needed; stutter-step to control bar level, especially during Salvo.
- Thunderdrum Salvo: Dodge ground swirls with minimal movement.
Assign movement callers if necessary.
- Voltaic Image (Heroic): Assign CC rotations or kiters.
Keep silencing pools at arena edges.
**Ta
nking Recommendations**
- Both bosses must ALWAYS be at least 40 yards apart.
Assign clear markers and practice transitions after intermissions.
- Use magic defensives for Flarendo’s Eruption Stomp; physical defensives for Torq’s Lightning Bash.
- Stay alert for side swaps: tanks are the first to reposition after collision phases.
**Healer & DPS Respo

A heavily armored and spiked vehicle designed for combat, featuring mounted weaponry and a fierce aesthetic, likely associated with the "Geargrinders" faction in the "Liberation of Undermine" raid from World of Warcraft.
nsibilities**
- Healers: Pre-assign CDs for intermissions and bomb soaks.
Clear communication for ramping damage intervals.
- DPS: Evenly split damage, keeping both bosses alive and dying within seconds of each other.
Maximize burst during intermission.
**Heroic-O
nly Adjustments**
- Scrapbombs create permanent fire pools; plan placements from Pull.
- CC/interrupt Voltaic Images; manage Torq stuns with strict movement calls.
- Handle spreading for Molten Phlegm, and practice precise pathing to avoid environmental clutter.
**Commo

The text features a character from World of Warcraft alongside the title "Cauldron of Carnage Boss Strategy Guide" and the branding "MYTHIC TRAP."
n Pitfalls**
- Killing one boss before the other.
- Failing to soak Scrapbombs.
- Over-moving on Torq side, resulting in mass stuns.
- Poor swap discipline after intermission, leading to lethal DoT stacking.
Expert insight: As Method notes, the encounter is “Amalgamation Chamber 2.0”—forgiving to tanks outside of intermission swaps, but absolutely punishing of raid mechanical errors.
Reliable group swaps and disciplined movement matter more than micro-optimization.
4.
Loot Drops & Rewards: What’s at Stake
The Cauldro
n of Carnage isn’t just a test of skill—it’s a treasure trove brimming with high-value rewards and innovations that keep every raid night fresh.
**Loot Structure & Item Level Progressio

A large mechanical character named Gromm is prominently featured, surrounded by a colorful and chaotic environment with palm trees, indicative of a dynamic battle setting in the Cauldron of Carnage raid from World of Warcraft.
n**
- Scalable Item Levels:
- LFR: Up to 639 ilvl (very rare)
- Normal: Up to 652 ilvl (very rare)
- Heroic: Up to 665 ilvl (very rare)
- Mythic: Up to 678 ilvl (very rare)
- Group Loot Only: All item-level trading restrictions are lifted; items can be freely traded.
- Boss-Specific Drops: Notable loot includes:
- Flarendo’s Pilot Light (caster DPS trinket)
- Torq’s Big Red Button (strength melee trinket)
- Tier Set Hands and unique class armor
- Dedicated loot table: Includes belts, bracers, and fun “Faded” effects.
**Gallagio Loyalty Rewards Club (Re
nown System)**
- Stacking raid-wide buffs: +3% damage/healing per key ranks, up to a potent +18% at Renown 19.
- Renown Perks:
- Raid skips, self-res, hotel hearthstone, vendors, movement boosts, crafting access, auctioneers, and more.
- Unique mounts and pets: Complete Renown tracks for vanity unlocks (like Thunderdrum Misfire, Darkfuse Chompactor) and exclusive cosmetic transmogs.
**Achieveme

A fierce, muscular character with red and grey armor stands beside a large, mechanical dinosaur head, accompanied by bold text labeling it as a "Cauldron of Carnage Boss Guide."
nts, Mounts, and Titles**
- Mounts: Glory of the Raider meta grants Junkmaestro’s Magnetomech; final boss Gallywix can drop the Prototype A.S.M.R. (all difficulties, rare) and Keys to the Big G (100% on Mythic, time-limited).
- Titles: Famed Slayer of the Chrome King (Mythic top 200), Liberator of Underminer (Mythic clear), Ahead of the Curve/Cutting Edge (timely clears).
- Glory Achievements: Encourage repeat runs for raid completionists.
**Great Vault I
ntegration & Professional Loot**
- More bosses killed = more weekly Great Vault slots.
- Early weeks: BoEs become Bind-on-Pickup in Mythic, ensuring progression loot stays in-raid before easing economy controls.
- Profession reagents may still drop as Personal Loot, adding crafting incentives.
**Expert I

A colorful, mechanized contraption features various gears and lights, possibly serving as a component within the "Cauldron of Carnage" in the "Liberation of Undermine" raid for World of Warcraft.
nsight**
The Cauldron’s reward systems are crafted for maximum engagement beyond mere stat upgrades:
"You will receive a +3% damage and healing buff starting at Renown 4, 7, 10, 13, 16, and 19, stacking up to 18%." (Icy Veins)
"Group Loot is the only method... all item-level restrictions... are entirely removed... allowing you to trade items with small item level increases that are not upgraded." (Wowhead)
Co
nclusion
The Cauldron of Carnage isn’t just another roadblock in Liberation of Undermine—it’s a masterclass in classic raid coordination, movement, and accountability.
Victory hinges not on raw throughput, but on repeatable, disciplined execution: proper raid splits, precise group swaps, soaking bombs, and managing movement restrictions.
For progressing teams, this encounter polishes fundamentals used throughout the rest of the raid, teaching invaluable habits that pay dividends on future bosses.
The smorgasbord of loot, titles, achievements, and Renown rewards ensures that every pull is not just a challenge, but an opportunity.
Steel your nerves, split your raid, master the swap—and may your loot rolls be ever in your favor.
The Cauldron awaits!
Resources for Further Learning:
Sources & Citations
- Cauldron of Carnage Strategy Guide - Liberation of Undermine Raid
- Heroic Cauldron of Carnage Boss Guide - Liberation of Undermine - Method
- Cauldron of Carnage Guide - Mythic Trap
- EASY GUIDE ON HOW TO BEAT FLARENDO & TORQ - SIMPLIFIED | Liberation of ...
- Cauldron of Carnage Boss Guide - Liberation of Undermine - YouTube
- Cauldron of Carnage Raid Guide - YouTube (Hazelnuttygames)
- Cauldron of Carnage - Warcraft Wiki
- Cauldron of Carnage Guide - Mythic Trap
- Cauldron of Carnage Boss Guide - Liberation of Undermine Raid
- Cauldron of Carnage - Warcraft Wiki
- Cauldron of Carnage Strategy Guide - Liberation of Undermine Raid
- Cauldron of Carnage Guide - Mythic Trap
- Heroic Cauldron of Carnage Boss Guide - Liberation of Undermine - Method
- Cauldron of Carnage Raid Guide - Normal and Heroic ... - YouTube
- Cauldron of Carnage Strategy Guide - Liberation of Undermine Raid
- Liberation of Undermine: Gallagio Loyalty Rewards Club Renown Track Guide
- Liberation of Undermine Raid Overview - The War Within Season 2
- Liberation of Undermine Raid Guide - Bosses, Loot & Rewards
- Cauldron of Carnage - Warcraft Wiki